

Key Takeaways
- Check your current RAM amount and available slots before purchasing any new memory.
- RAM type, speed, and form factor must match your motherboard's specifications exactly.
- Most desktops allow RAM upgrades; many laptops have soldered memory that cannot be replaced.
- Static electricity can permanently damage RAM - always ground yourself before handling modules.
- Installing RAM in matched pairs unlocks dual-channel performance on compatible motherboards.
What you will need
Why RAM Upgrades Are Worth Considering
RAM - short for Random Access Memory - is the short-term working space your computer uses to run programs, switch between browser tabs, and handle multiple tasks at once. When available RAM runs low, the operating system compensates by using much slower storage as a temporary substitute, which is why an underpowered system feels sluggish. For a plain-English explanation of how RAM fits into the bigger picture, see our desktop specs glossary.
Upgrading RAM is often one of the most cost-effective ways to extend a computer's useful life, particularly for systems running 8 GB or less that are used for tasks like video calls, photo editing, or keeping many browser tabs open simultaneously. Unlike a full system replacement, a RAM upgrade preserves everything else you rely on.
More RAM Isn't Always the Right Fix
If your computer feels slow, confirm that RAM is actually the bottleneck before upgrading. Open Task Manager (Windows) or Activity Monitor (Mac) and check memory pressure or usage during typical tasks. If RAM usage is consistently below 70-80%, a storage or software issue may be the real cause. Our guide to what's worth knowing before upgrading a desktop component covers this in detail.
That said, not every slowdown is a RAM problem - and not every computer accepts new RAM. The steps below will help you confirm your situation before spending anything.
What You'll Need
Before opening any panels, gather the right tools and information. Attempting an install without confirming compatibility first is the most common and costly mistake. Review the key specs to check before buying any upgrade component if you're unsure what to look for on a spec sheet.
What you will need
Anti-static wrist strap
Discharges static electricity from your body before you handle sensitive components.
Phillips-head screwdriver
Used to open the desktop case side panel or remove a laptop's back cover.
System information tool (e.g., CPU-Z, free download)
Reads your current RAM type, speed, and slot configuration before you buy.
Compressed air canister
Clears dust from RAM slots before inserting new modules.
If you have a laptop and are uncertain whether its RAM is upgradeable, check the manufacturer's product page or service manual before doing anything else. See our overview of RAM vs. storage for laptops for context on what's typically accessible.
Check Before You Buy: Soldered RAM Cannot Be Upgraded
Many modern thin laptops and some compact desktops have RAM soldered directly onto the motherboard. This means no upgrade is physically possible, regardless of how much you spend. Always confirm your specific model has user-accessible RAM slots by checking the manufacturer's documentation or a teardown resource before purchasing any memory.
Step-by-Step Installation
Follow these steps in order. Each one builds on the last - skipping ahead, particularly past the compatibility and power-down steps, is where damage typically occurs.
Static Electricity Can Destroy Your Components
A single static discharge - too small to feel - can permanently damage RAM or the motherboard. Always use an anti-static wrist strap or frequently touch an unpainted metal surface to ground yourself throughout the process. Avoid working on carpet and keep RAM in its anti-static packaging until the moment of installation.
Find out what RAM you currently have
On Windows, press Win + R, type msinfo32, and press Enter. Look for Installed Physical Memory (RAM). For slot and speed details, a free utility such as CPU-Z gives a clearer picture. On a Mac, click the Apple menu, select About This Mac, then More Info to see installed memory.
Note the total amount installed, the memory type (e.g., DDR4 or DDR5), the current speed in MHz, and how many slots are occupied versus available.
Verify compatibility before buying
RAM compatibility depends on three things: type (DDR4 and DDR5 are not interchangeable), speed (your motherboard has a rated maximum), and form factor (full-size DIMMs for desktops; SO-DIMMs for laptops). Mixing incompatible RAM can prevent the system from booting. See key specs to check before buying any upgrade component for a thorough compatibility reference.
Power down and prepare your workspace
Shut the computer down completely - do not use sleep or hibernate. Unplug the power cable. If working on a desktop, press the power button once after unplugging to discharge any residual power in the capacitors. Set the computer on a non-carpeted surface. Attach your anti-static wrist strap to an unpainted metal part of the case, or touch the case frame to ground yourself before reaching inside.
Open the case and locate the RAM slots
On a desktop, remove the side panel (usually one or two thumbscrews on the back). RAM slots are long, narrow connectors near the CPU - typically colored in pairs to indicate dual-channel groupings. On a laptop, unscrew the bottom access panel. If your laptop manual shows no RAM panel, the memory is likely soldered and cannot be upgraded.
Use compressed air to clear any visible dust from the slots before proceeding.
Remove existing sticks if necessary
If you are replacing existing RAM rather than filling empty slots, press the retaining clips at both ends of the slot outward simultaneously. The stick will pop up at an angle - pull it straight out. Store old sticks in an anti-static bag.
Insert the new RAM modules
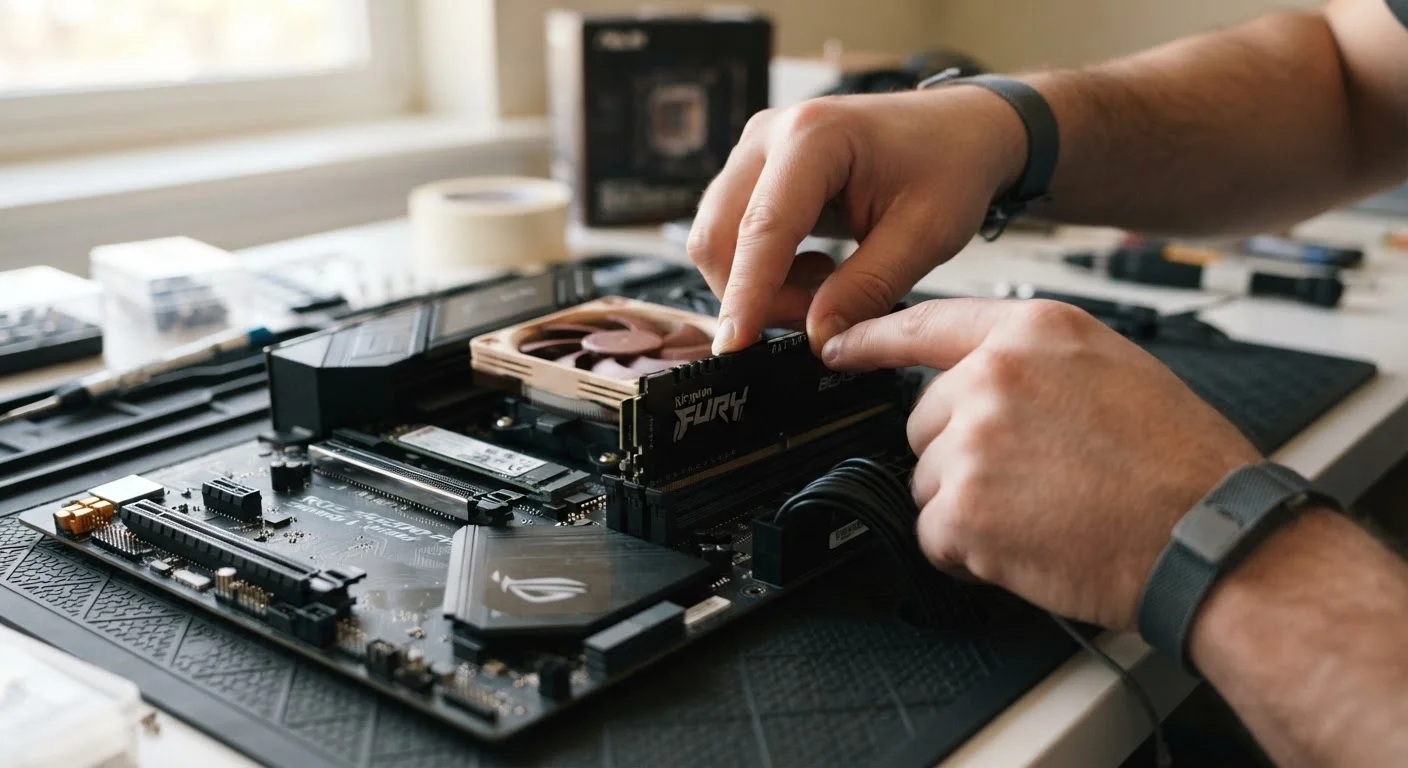
Hold the RAM stick by its edges - avoid touching the gold contacts or chips. Align the notch on the bottom of the stick with the ridge inside the slot; this ensures you insert it in the correct orientation. Press down firmly and evenly on both ends until the retaining clips click into place. The stick should sit flush with no gap between it and the slot.
If adding two sticks to a dual-channel board, consult your motherboard manual for the recommended slot pairing - it is often slots 2 and 4 rather than 1 and 2.
Reassemble and confirm the upgrade
Replace the case panel or laptop back cover. Reconnect the power cable and power on the computer. Enter the BIOS/UEFI (usually by pressing Del or F2 immediately after powering on) and confirm the system recognizes the new total RAM amount. Then boot into the operating system and verify the figure again via msinfo32 or About This Mac.
Troubleshooting and Next Steps
If your computer boots but the OS reports less RAM than you installed, the most likely causes are an unseated module, a slot that doesn't support the speed you purchased, or a BIOS that needs updating to recognize newer memory specifications. Re-seating the sticks resolves the issue in most cases.
If the machine won't boot at all after the upgrade, the RAM type is likely incompatible. Re-install your original sticks to confirm the system still works, then recheck the specs against your motherboard documentation.
For a broader look at what can go wrong during component upgrades - and how to avoid those situations - see seven things worth knowing before upgrading a desktop component. And if you're thinking about other improvements alongside RAM, the Desktop PCs hub covers storage, graphics, and more.